









PS3 Steam Deck Tutorial

Are you wanting to play PS3 games on your Steam Deck and need a little help with the setup? If so then you are in luck. In Today’s article PS3 Steam Deck Tutorial, we have another emulation guide that covers installing and running Playstation 3 games on the Steam Deck. The emulator we will be using is called RPCS3. This emulator has fantastic compatibility with over 2264 playable games, you can play your PS3 games and even PSN games. Let us begin…
Installation
First of all, we need to be in Desktop Mode on the Steam Deck and open the Discover store. Search for RPCS3 and then hit the installation button top right.

Next, we need to grab the PS3 Firmware, so open up a browser on the Steam Deck (Firefox in my case) and type in PS3 Firmware and download it. If you are presented with a pop-up warning, you can ignore this and select to keep the file.

Once the file has downloaded and still being in Desktop Mode, launch the RPCS3 emulator from your applications menu. Select File – Install Firmware. Once presented with a pop-up window, locate the PS3UPDAT.PUP in your downloads folder and select Open. This will install the firmware we just downloaded.


In the RPCS3 UI, I recommend installing a dark theme, so this makes things easier to see. You can do this by going to Configuration – GUI – UI Stylesheets – Kuroi.
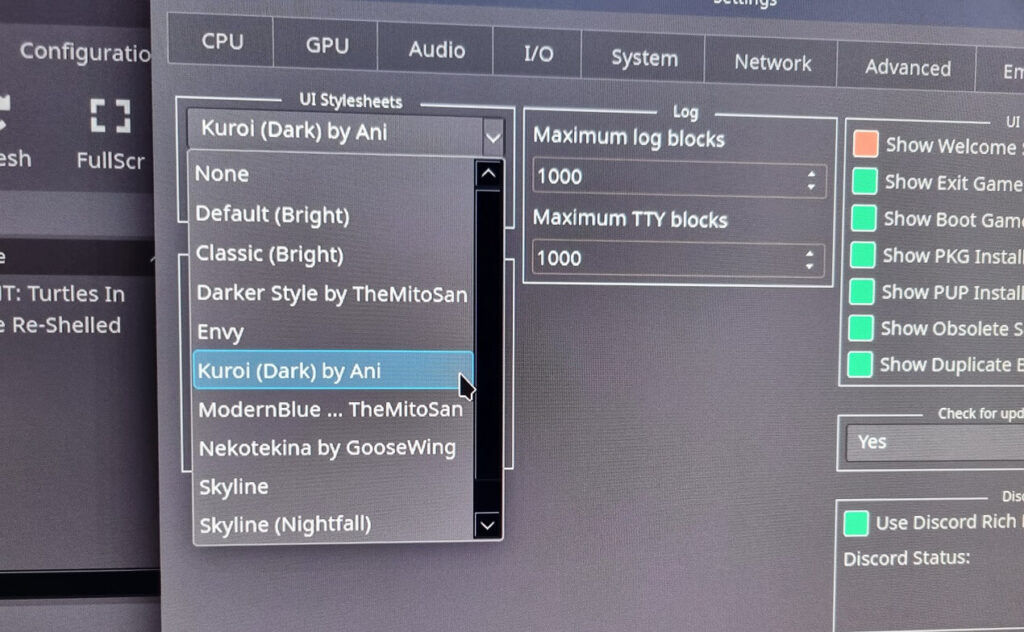
Dark Mode
Installing PS3 Games
Assuming you have a PS3 games folder with your files inside, we can add our games by selecting Open in the top left and then navigating to your games folder to select the parent folder of the game you wish to add. PS3 game files will come as a series of subfolders, so be sure to select the parent. This will be the name of the game with some digits, for example, Demons Souls BLUS30443.
As soon as the game is added, it will start compiling the modules, so wait for this to complete, and then as soon as it’s finished, you can close down RPCS3.

Before we go to Gaming Mode, we need to open Steam, select Library, and add a non-Steam game. Search the list for RPCS3, check the checkbox, and select Add Selected Programs. We can now return to Gaming Mode to finish setting up RPCS3.


Controllers
In gaming mode, select your library, then find and open RPCS3. This should be located in the non-steam section. With RPCS3 running, select the Pads icon in the top center and this will open up the controller configuration. Under Handlers in the top left, change it from keyboard to Evdev as pictured below, and hit save in the bottom right. This will automatically set up Xinput so you can use the Decks onboard controls.

Custom Configuration
Right-click on a game you have installed and select Create Custom Configuration, and then select the GPU tab. For this section, it’s a good idea to check the RPCS3 Wiki for the game you want to run, as there may be recommended settings for better performance. The settings in the image below have so far worked fine for me with a number of games.
Do not change the default resolution. if you want to change the resolution, use the Resolution Scale.

One last thing to do before playing a game is to check if there are any patches available. Back on the main RPCS3 UI and along the top bar, select Manage, then select Manage Game Patches from the popup window.

If for some reason the patches window does not show, press the Steam button and then select Update patches. Select yes from the popup box and then a list of all patches will display. You can check the box to show only patches for your installed games. Now you can navigate down through your game and apply the patches you want.
That is all there is to it really you can now run your games and have fun. Thanks for reading my PS3 Steam Deck Tutorial and if you need any help at all then feel free to reach out. Until next time, stay cool.
To see how to add custom artwork to your emulators and games see our article here