









Nintendo Switch Joy-Con Repair

If your Nintendo Switch Joy-Con has stopped lighting up and syncing when you press the SL/SR buttons then it will need a repair. The repair process luckily is fairly simple to do and saves you from buying replacements at a higher cost. Today I will go through the repair process of the left Joy-Con step by step. There are a few things you will need which I will list below.
Please note: If you are repairing the right Joy-Con, scroll down to the bottom of the page for an important note.
A Tri-Wing screwdriver to open the joycon
Small 30mm 1.5 Pozidrive for the internals
A spudger to help ease open the Joy-Con
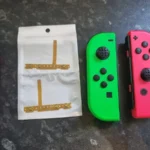
Joy-Con Flex Cable for the repair.
You can buy everything you need in a bundle

Opening the Joy-Con
Using the Tri-Wing driver we locate the 4 screws on the back of the Joy-Con and remove these. Once removed we need to use a spudger to go around the groove and gently prise open the controller. Once done, gently open the controller like a book from the back and this will open out. See images below.


Remove the Battery
The next step is to remove the battery and the battery compartment. Using your spudger or screwdriver, place it under the batter and gently lift. The battery is glued down but will lift out easily enough. Be careful as it will still be connected. leave it connected and place it out of the way as pictured below. We will then need to remove the compartment. The number of screws will vary depending on which Joy-Con you repair. In this Left Joy-Con case, there are 5 screws. Be careful when removing the compartment as there is a ribbon cable connected.


Disconnect the Ribbons
We now have to disconnect the 2 ribbons to separate the back of the Joy-Con from the front. There are 2 small tabs on the sockets that you will need to lift up to enable the ribbons to disconnect. You can lift these using a screwdriver. Once the tabs have been lifted facing upwards, you can then gently disconnect both ribbons.

Replacing the Flex Ribbon
Lastly, we now just unscrew the flex ribbon cover and replace it with our new one. If you have bought a pack of 2 ribbons then be sure to match the correct one. You can do this by just comparing it with the old ribbon.

Put the Joy-Con back together
You can now reverse the steps to put the Nintendo Switch Joy-con back together. Pay close attention to the ribbon sockets and be sure they are facing upwards when reconnecting. If you have done everything correctly then the Joy-Con lights will show and you can now sync this to your switch.


Important note on repairing the Right Joy-Con
When disassembling the right Joy-Con be careful and pay attention to the top ribbon after removing the battery compartment. If you remove this ribbon then it will be very hard to put back due to the very small length. Try and place the battery compartment at an angle when removing and you should be good to continue.


That is all there is to it. I hope you have enjoyed this guide and that it has been useful to you.
Until next time…
Jamie E